Remodeling a Home - Roofing - Walls - Painting
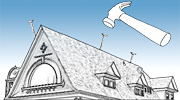
Roofing
When remodeling an existing house that has a bad roof, have the roof repaired first to prevent further deterioration of the roof or even the house below. With home additions or room additions, have the roofing completed early on for the same reason. Also, with the roof completed your other contractors can work inside on other phases of construction regardless of the weather.
Your carpenter can repair any rotted or sagging roof framing and your roofing contractor will then install new roofing or patch existing roofing per your specifications. Note: If there is to be chimney repair or a new chimney, and you are putting on new roofing, have the roofer leave the shingles off adjacent to the chimney. This will prevent damage to the new roofing while any chimney work is done. Hold back 10 percent of the roofer’s contract amount until he can come back and finish this area after the chimney is completed.
Electrical, Plumbing, Heat-A/C
All your electrical, plumbing and HVAC should be completed at this time, prior to insulation of side walls. Note: Don’t change the water supply pipes, unless you do not have good water pressure. You can change them later if necessary with little damage to existing walls. The same applies to electrical work. If existing electrical service is adequate for most of the house, don’t remove it unless you are doing a full gut. Of course, you can upgrade if added electrical demand will require it. Of course if it is deemed unsafe, remove it.
Chimney
Chimneys can now be added or repaired. Old chimneys, if they are structurally sound (see your inspection engineer’s report), should be relined with terracotta flue liners and new dampers, if this was deemed necessary when they were inspected. This is faster and less expensive than completely rebuilding.
Exterior Siding and Trim
This phase can be completed while your electrical, plumbing, and HVAC work is being done inside.
Insulation
The cost of energy is sure to keep rising, so it pays to insulate well. Virtually every structure can be insulated without removing the inside walls. This is accomplished by drilling small holes in exterior walls from the outside and blowing fiberglass or cellulose insulation through the hole into the wall-cavity. The hole is then plugged.
The alternative is to remove the interior plaster or drywall of all exterior walls to install insulation batting. This obviously is quite expensive unless you are doing a full gut anyway. Blowing the insulation into the wall cavities provides adequate insulation for most climates, and a reputable firm should do the job neatly. You will not, however, have the vapor barrier that you would get with insulation from inside. You can compensate for this by painting all exterior walls with a vapor barrier paint. Check local suppliers for types available in your area.
Vapor barriers are important because moisture escapes through the walls, lessening the effectiveness of the insulation and rotting the framing. Before the insulation was added there was no such problem because the moisture went through to the outside. Now it can’t, so the object is to keep it inside the heated area. This also adds to your comfort, as moist air is more comfortable than dry air.
Be sure attic areas, crawl spaces, and basements are insulated as well as you can afford. Your utility companies can provide you with information on the amount of insulation needed for lowest rates and greatest savings.
Drywall or Plaster
Now you are ready for the installation or patching of plaster or drywall. Where possible, use drywall to replace missing plaster or to cover cracked plaster. It is far less expensive and looks better. Look for a drywall contractor who supplies all materials and removes all trash. Plasterers always supply materials. In the winter you will need temporary heat to help speed the drywall or plastering job and to prevent cracking caused by freezing — both drywall mud, or filler, and plaster are water-based.
Prime Painting
I find it beneficial to prime the walls as soon as the plaster or drywall sub is finished. Imperfections in the wall show up after priming and serious flaws can be corrected now or later. Discuss that with your drywall or plaster sub beforehand.
Interior Trim
Interior doors, trims, and moldings are repaired, replaced, or added at this time, and new cabinets, if any, for your kitchen and baths installed.
Painting
You are now ready for interior as well as exterior painting, although exterior painting could be completed earlier — right after exterior trim. That should be discussed and worked out with your painting sub. It is usually easier to complete the whole job at one time.
Final Trims
At this time you are ready to install any countertops, vinyl flooring, plumbing fixtures, electrical trims, light fixtures, and final trim for heating and air conditioning — in that order.
Note: If you are finishing or refinishing hardwood floors, I recommend you wait until all the above work is complete and have the floors done just prior to laying any carpeting. Install carpeting and hang wallpaper, then proceed with the cleanup.
